
Planting
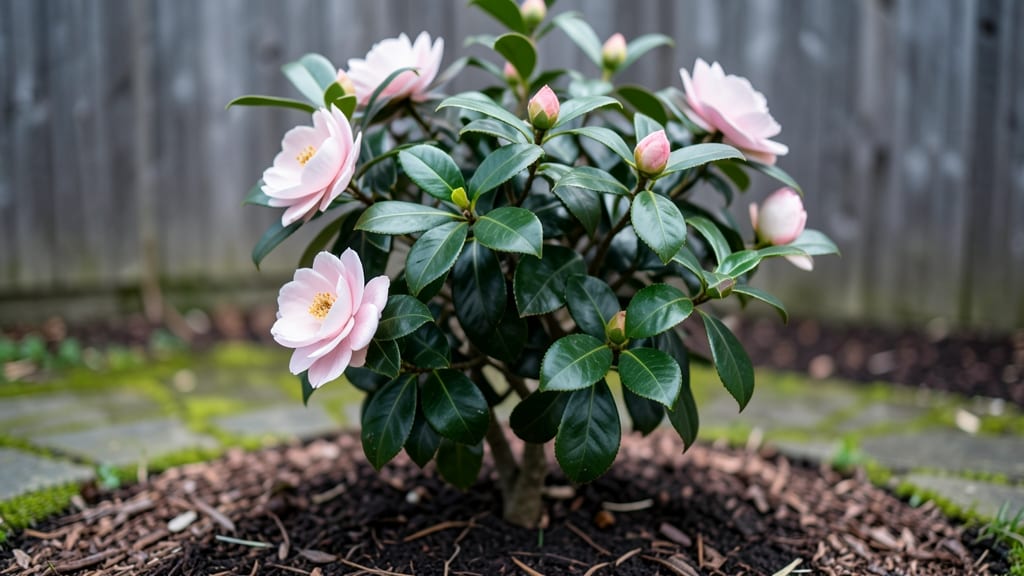
Cold-hardy camellias in Zone 6 aren’t just possible—they’re stunning when planted right. 🌿 I’ve grown these winter-bloomers for years, and the secret lies in choosing the toughest varieties (Camellia sasanqua or Winter’s Star) and giving them the right care from day one.
These plants reward patience with glossy foliage and fragrant blooms even when your neighbors’ gardens are dormant.
The key starts with soil—camellias crave acidic, well-draining mixes (think pine bark or peat moss). Plant them where they get morning sun and afternoon shade, and mulch heavily in fall to insulate roots from freezing temps.
Most gardeners overlook winter protection, but a thick layer of mulch (3-4 inches) and a burlap wrap around the base can mean the difference between a dead plant and one that blooms again next spring.
By late winter, you’ll see those first buds forming, and with proper pruning (shape in early spring, never after blooming), your camellias will produce larger, healthier flowers each year.
The fragrance alone—especially on crisp mornings—makes the effort worthwhile. Even in Zone 6’s harsh winters, these plants prove that beauty isn’t seasonal.
This method works for both new plantings and established shrubs. The only real mistake is skipping the mulch or pruning at the wrong time. With these adjustments, your camellias will thrive where others fail. Ready to transform your winter garden?
📚 In This Guide
- What you need
- Instructions
- Tips and common mistakes
- Wrapping up and next steps
What you need
- ● Cold-hardy camellia varieties: Choose Zone 6-tolerant types like Camellia japonica ‘Winter’s Star’ or Camellia sasanqua ‘Yuletide’ (2–3 plants for optimal display).
- ● High-quality acidic soil: 10–15 gallons of peat moss or pine bark fines (pH 5.0–6.0). Mix with native soil in a 2:1 ratio for planting.
- ● Organic mulch: 3–4 inches of pine straw or wood chips (avoid cedar—it’s toxic!).
- ● Slow-release fertilizer: 1 lb of 10-10-10 or 8-3-9 (acid-loving plant formula). Apply in early spring and fall.
- ● Shovel & garden fork: For digging and aerating soil (a bypass pruner for cleanup).
- ● Garden hose with spray nozzle: For deep watering (aim for 1–2 inches per week, more in summer).
- ○ Burlap or frost cloth: 1–2 rolls to wrap young plants in late fall (optional but highly recommended for Zone 6 winters).
- ● Soil pH test kit: To confirm acidity levels before planting.
- ● Mulch volcano guard: A ring to keep mulch away from the trunk (prevents rot).
- ● Drip irrigation system: For consistent moisture (especially in dry spells).
- ● Epsom salt: 1 tbsp per plant in spring for magnesium boost (if leaves yellow between veins).
- ● Winterizing spray: Anti-desiccant (like Wilt-Pruf) to protect blooms from freeze-thaw cycles.
Step-by-step guide for planting cold hardy camellias in Zone 6
Here's how to establish these resilient beauties for winter-blooming success.
🪴 Step 1: Select the Perfect Planting Site
Camellias thrive in partial shade, with morning sun and afternoon shade ideal for Zone 6. Choose a location with 4-6 hours of filtered light daily—direct afternoon sun can scorch tender new growth. I always test the spot in winter: if it stays above 10°F and doesn't freeze solid for weeks, it's suitable.
Soil must be acidic (pH 5.5-6.5) and well-draining. If your native soil is alkaline or clay-heavy, amend with 2-3 inches of organic matter like composted pine bark or leaf mold. Dig a hole twice as wide as the root ball but only as deep—planting too deep suffocates roots. Loosen the sides of the hole with a shovel to prevent compaction.
🌱 Step 2: Plant at the Right Time and Depth
Fall planting (after leaf drop but before hard frost) gives roots time to establish before winter. In Zone 6, aim for October or early November. Remove the plant from its container and gently tease apart any circling roots—this encourages outward growth. Place the root ball in the hole so the top sits 1-2 inches above ground level.
Backfill with native soil mixed with 20% organic matter to maintain acidity. Water deeply to settle the soil, then add a 2-inch layer of mulch (pine straw or shredded bark) to insulate roots. Avoid wood chips—they decompose too slowly and can raise soil pH over time. The mulch should touch the plant's base but not mound against the stem.
☀️ Step 3: Winterize for Zone 6 Survival
Once planted, protect young camellias from freeze-thaw cycles that cause root heave. Wrap the root zone with burlap or frost cloth in late fall, securing it with landscape staples. For established plants, apply a 4-inch layer of mulch around the base—this acts like a blanket, keeping soil temps 5-10°F warmer than ambient air.
In Zone 6 winters, camellias may lose leaves but should recover by spring. If temperatures drop below -10°F for extended periods, add a lightweight row cover over the entire plant. Never use plastic—it traps moisture and causes rot. Check plants after heavy snowfall; gently brush off accumulation to prevent branch breakage. Buds form in late summer, so avoid heavy pruning until after flowering.
💧 Step 4: Spring Care for Robust Blooming
Resume watering when soil feels dry 2 inches down in spring, aiming for 1 inch of water weekly. Camellias are drought-tolerant once established but need consistent moisture during bud formation. Fertilize in early spring with an acid-loving plant formula (10-10-10 or 8-3-9)—apply half the recommended rate to avoid burning roots.
Prune immediately after flowering to shape the plant and remove dead wood. Cut back to just above a leaf node at a 45-degree angle to encourage new growth. Avoid heavy pruning in fall—it stimulates tender shoots that won't survive winter. Watch for yellowing leaves, which often signals iron deficiency (common in alkaline soils). If this happens, apply iron chelate according to package instructions.
Tips & tricks for perfect cold hardy Camellia planting in Zone 6
These hard-won lessons will help you avoid the most common pitfalls when establishing winter-blooming camellias in challenging Zone 6 conditions.
Light Balance: The 4-6 hours of filtered light recommendation is non-negotiable for Zone 6 success. I've seen camellias struggle when planted under dense tree canopies that block all direct light—even morning sun alone won't cut it. Test your site by observing how much sun reaches the ground during winter months, especially in December when days are shortest. A good rule of thumb is to find a spot where the ground stays visible but shaded by trees or structures by mid-afternoon.
Soil Science: That 2-3 inch layer of organic matter isn't just about drainage—it's about creating the perfect acid environment. I've had the most success with a 50/50 mix of composted pine bark and leaf mold. If your soil tests above pH 6.5, consider adding sulfur granules (1 pound per 100 square feet) 2-3 months before planting to gradually lower the pH. The goal is to mimic the acidic forest floor conditions these plants evolved in.
Winter Protection Strategy: When wrapping with burlap or frost cloth in Step 3, make sure to leave the top open—this allows moisture to escape while still insulating roots. I've seen too many gardeners suffocate plants by completely enclosing them. Also, for that 4-inch mulch layer, use only organic materials like pine straw or shredded bark. Inorganic mulches or wood chips can actually raise soil pH over time, which is the last thing you want for acid-loving camellias.
Spring Watering: The 1 inch of water weekly guideline assumes average spring rainfall. In Zone 6, where springs can be unpredictable, I recommend checking soil moisture every 5-7 days. The key is to water deeply but infrequently—camellias hate soggy roots but need consistent moisture during bud formation. A soil moisture meter is worth the investment for this critical step.
Pro Tips for Cold Hardy Camellias Zone 6
- These hard-won lessons will help you avoid the most common pitfalls when establishing winter-blooming camellias in challenging Zone 6 conditions.
- Light Balance: The 4-6 hours of filtered light recommendation is non-negotiable for Zone 6 success.
- Soil Science: That 2-3 inch layer of organic matter isn't just about drainage—it's about creating the perfect acid environment.
Frequently asked questions
Can cold-hardy camellias survive Zone 6 winters without extra protection?
Most cold-hardy camellias (like Camellia sasanqua or Camellia japonica varieties) can tolerate Zone 6 winters down to 5°F (-15°C) with proper care. However, young plants or tender varieties may need mulch (3-4 inches) and winter wraps for the first few years. Pro tip: Plant in well-draining soil and avoid late-season fertilizing to boost cold resilience.
What’s the best time to plant cold-hardy camellias in Zone 6?
The ideal window is early spring (March-April) or fall (September-October) when soil is workable but not frozen. Fall planting gives roots time to establish before winter, while spring avoids early frost risks. Avoid planting in extreme heat or cold—roots need stable conditions to thrive!
Are there alternatives to traditional camellias for Zone 6?
Yes! If camellias seem tricky, try these Zone 6-friendly evergreens with winter interest:
- Dwarf Oregon grape (Mahonia) – Hardy, fragrant flowers, and glossy leaves.
- Inkberry holly (Ilex glabra) – Thrives in shade, drought-tolerant.
- Pieris japonica – Stunning spring blooms, cold-resistant.
Why are my cold-hardy camellias dropping buds before blooming in Zone 6?
Bud drop is often caused by late frosts, temperature swings, or dehydration. To prevent it:
- Choose late-blooming varieties (e.g., Camellia sasanqua ‘Yuletide’).
- Water deeply before winter and mulch heavily.
- Avoid pruning in late winter—it stresses the plant when buds are forming.
How do I protect my camellias from heavy snow or ice in Zone 6?
Camellias are sturdy, but heavy snow can break branches. Gently brush off snow (don’t shake!) and tie weak stems to stakes for support. For ice, avoid de-icing salts—they harm roots. Instead, use sand or kitty litter for traction around the plant. Pro tip: Plant in a sheltered spot (like near a fence) to reduce wind damage.
Wrapping up and next steps
Growing cold-hardy camellias in Zone 6 is absolutely doable with the right care—and what a reward! These stunning blooms prove that winter doesn’t have to mean dormancy for your garden.
By selecting the toughest varieties, providing mulch protection, and giving them the right spot, you’ll enjoy vibrant flowers even in chilly climates.
Ready to transform your garden? Start small: pick one variety to test, prep the soil, and plant with confidence. Before you know it, your yard will be a winter wonderland of color! 🌸❄️