
Plants
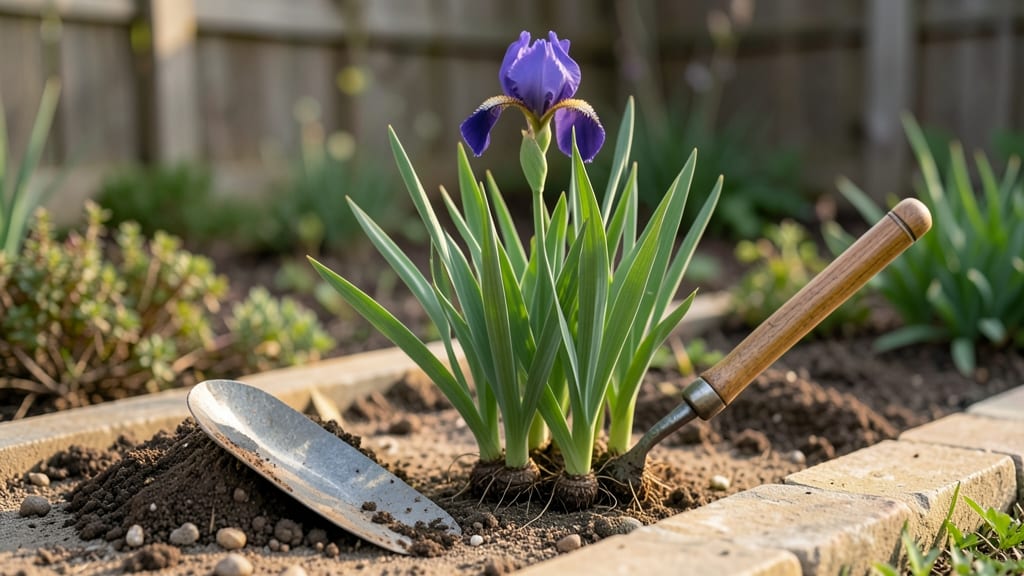
Planting iris bulbs in Zone 4 requires precision—aim for late summer to early fall when soil temps hover around 60°F and before the first frost hits.
Zone 4 gardeners know timing is everything—plant too early, and the bulbs rot; too late, and you’ll miss the critical root growth window. A 6-week buffer before the ground freezes is your sweet spot for strong, hardy plants that’ll bloom next summer.
Why does this matter? Iris 🌸 rhizomes need time to establish roots before winter, and Zone 4’s harsh freezes don’t forgive mistakes. The ideal window is August through September, when soil stays workable but temperatures drop just enough to signal dormancy.
Below, I’ll break down the exact frost guidelines, soil prep tips, and how to adjust for early or late freezes—so your irises thrive year after year.

Optimal planting windows for iris bulbs in Zone 4 (with frost guidelines)
Iris bulbs—actually called rhizomes—thrive in Zone 4 when planted during a precise 6-week window before the ground freezes. This timing ensures strong root establishment before winter dormancy.
Miss it, and you risk weak growth or bulb rot from soggy soil. Let’s break down the science-backed schedule to maximize blooms next spring.
Zone 4’s first frost typically arrives around mid-September, but this varies by microclimate. Check your local USDA frost date—planting 6 weeks before ensures rhizomes anchor before cold sets in. For most of Zone 4, this means late August to early September.
Adjust earlier if your area freezes sooner (e.g., northern Minnesota) or later if you’re in milder pockets (e.g., southern Michigan).
| Planting Window | Soil Temp | Frost Risk | Action |
|---|---|---|---|
| Late August | 55–65°F | Low | Ideal time; rhizomes establish roots |
| Early September | 50–60°F | Moderate | Last chance; soil may cool quickly |
| Mid-September | 45–50°F | High | Risky; roots may not harden in time |
| Spring (April) | 40–50°F | None | Second choice; blooms delayed by 2–3 weeks |
Spring planting is possible but not ideal for Zone 4. If you plant in early April, rhizomes may produce smaller blooms later in the season. The trade-off? Avoiding fall planting if your soil stays too wet after rain.
For spring plantings, wait until the soil warms to at least 50°F—test with a soil thermometer or wait until forsythia blooms.
Soil temperature is the critical factor for success. Iris rhizomes need warm soil (55–65°F) to spur root growth. Use a soil thermometer to confirm—if temps drop below 50°F, roots slow or stop. In Zone 4, this usually means late August is the sweet spot.
If your soil heats up faster (e.g., sandy loam), you might plant early August; if it’s heavy clay, wait until early September.
Adjust for early frosts by planting 2–3 weeks earlier if your area tends toward cold snaps. For example, if your first frost is September 1, aim for mid-August planting.
Conversely, if you’re in a warmer microclimate (e.g., near a lake or urban heat island), you might extend the window to early October. Always prioritize root establishment over pushing the limit.
Pro tip: Mulch after planting with 2–3 inches of straw to insulate rhizomes and retain moisture. This buys 1–2 extra weeks of root growth before frost. Avoid thick mulch layers—they can smother rhizomes or trap moisture, leading to rot.
Instead, use a light layer and remove it in spring once new growth appears.
Spring plantings should only happen if you missed the fall window or bought rhizomes too late. Plant in early April, but expect delayed blooms (by 2–3 weeks) compared to fall-planted irises.
The key is to plant as soon as soil is workable—don’t wait for perfect conditions. Rhizomes need 6–8 weeks to establish roots before summer heat arrives.
Zone 4’s chilly climate makes timing even more critical. Unlike tropical bulbs, iris rhizomes require cold exposure to harden off for winter. Planting too late leaves them vulnerable to heaving (bulbs pushing out of soil during freeze-thaw cycles).
To prevent this, plant deeper (3–4 inches) in heavier soils or shallower (2–3 inches) in sandy soil, with the top visible.
For container-grown irises, the rules shift slightly. Plant in late spring (May) and move pots to a protected location (e.g., garage or insulated shed) before first frost.
This mimics the 6-week root window but gives you flexibility. Just ensure pots have drainage holes—iris rhizomes hate soggy roots.
Remember: 6 weeks before frost is your golden window. Use a frost calendar for your specific location (check
How to prepare iris bulbs for Zone 4’s harsh winters (before and after planting)
Zone 4 winters can be brutal for iris bulbs, but with the right prep, your rhizomes will thrive. The key is pre-planting health checks and post-planting protection to shield them from freezing temperatures and moisture extremes.
I’ve learned that even hardy irises need a little extra care in our climate—let’s break it down step by step.
First, inspect your iris rhizomes for soft spots, mold, or damage before planting. Healthy rhizomes should feel firm with a slight give, not mushy. If you find any issues, trim away the damaged areas with sterilized pruners and let them dry for 24 hours.
This simple step prevents rot during winter’s damp spells.
Next, amend your soil to improve drainage—a critical factor in Zone 4. Irises hate soggy conditions, so mix in sand or perlite (20% of the soil volume) if your garden has heavy clay.
A pH test is worth your time too; irises prefer slightly acidic to neutral soil (pH 6.0–7.0). If your soil is off, add elemental sulfur or lime accordingly.
Mulching for Zone 4 Iris Bulbs
Organic Mulch
- ✅ Pros: Improves soil fertility, retains moisture, natural decomposition
- ✅ Best for: Long-term health, compostable options (straw, shredded leaves)
Synthetic Mulch
- ✅ Pros: Long-lasting, weed suppression, consistent insulation
- ✅ Best for: Harsh winters, low-maintenance gardens (landscape fabric, black plastic)
Organic: Can compact over time, may harbor pests
Synthetic: Blocks natural soil aeration, must be removed in spring
After planting, mulch strategically to protect iris rhizomes. Apply a 3-inch layer of organic mulch (like straw or shredded bark) in late fall, but avoid piling it directly against the rhizomes—leave a 2-inch gap to prevent rot.
For extra insulation in Zone 4’s deep freezes, top with 6 inches of straw or use landscape fabric under organic mulch for a hybrid approach.
Don’t forget frost protection for newly planted irises. If a hard freeze (below 10°F) is forecasted, cover the bed with burlap or frost cloth, securing it with bricks or stakes.
Remove the cover during the day to prevent overheating. This simple trick saved my first batch of irises during a Zone 4 winter dip to -15°F!
Finally, monitor moisture levels through winter. While irises are dormant, they still need minimal water—about once a month if we have dry spells. Overwatering in winter leads to bulb rot, so check soil moisture before watering.
By spring, your irises will reward you with vibrant blooms and stronger rhizomes for years to come.