
Planting
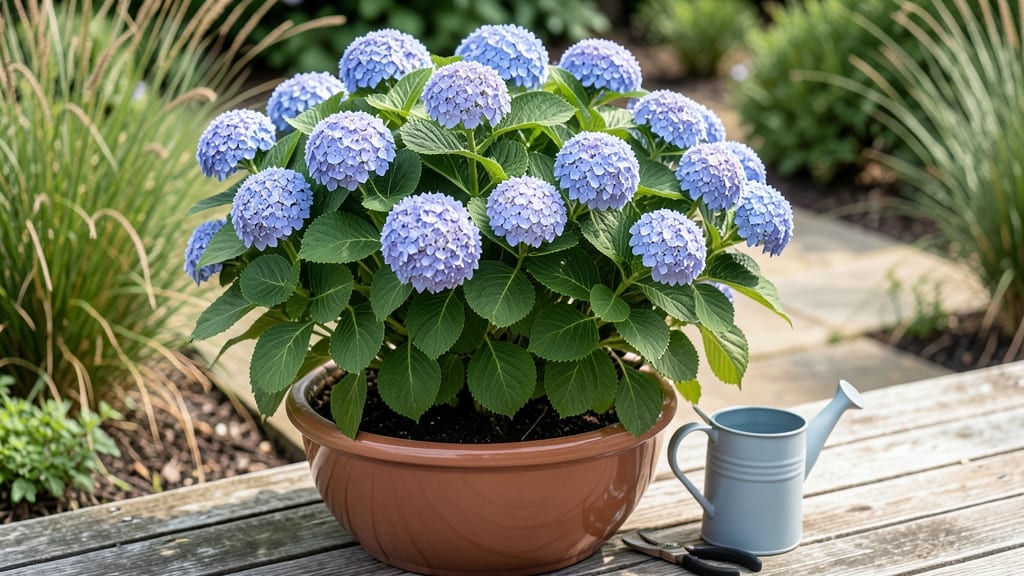
Growing hydrangeas in Zone 6 means choosing the right varieties and timing—like planting paniculata types in early spring before the heat sets in. 🌸 I’ve learned the hard way that some varieties wilt under Zone 6’s summer sun or freeze back in winter, but the right ones thrive with minimal fuss.
The secret? Matching your hydrangea to your microclimate and giving it a little winter protection.
Zone 6’s biggest challenge is the swing from scorching summers to freezing winters, but hardy varieties like Oakleaf or Limelight handle it like pros. Plant them in partial shade to avoid leaf scorch, and amend your soil with compost—hydrangeas love rich, moist conditions.
Most gardeners in Zone 6 plant in late April or early May, giving roots time to establish before summer’s heat.
Winter care is simple: mulch heavily after the first frost (3–4 inches of straw or leaves), and wrap young plants in burlap if temps drop below 10°F.
By spring, you’ll see lush foliage and blooms that outshine anything from a nursery. The payoff? Hydrangeas that come back bigger and more vibrant every year.
This works for both paniculata (cone-shaped blooms) and macrophylla (bigleaf types), though the latter may need extra winter protection in colder microclimates. Stick with these steps, and your hydrangeas will become the showstopper of your garden—without the drama.
📚 In This Guide
- What you need
- Instructions
- Tips and common mistakes
- Wrapping up and next steps
What you need
- ● Hydrangea plants: Choose bigleaf (H. macrophylla), panicle (H. paniculata), or oakleaf (H. quercifolia) varieties. Buy 1-3 mature plants (3-5 gallons in size) or 5-10 young nursery starts (1-gallon pots) for fuller coverage.
- ● Well-draining potting mix: 10-20 lbs of a blend like Miracle-Gro Potting Mix or FoxFarm Ocean Forest (for containers). For in-ground planting, amend native soil with 5-10 lbs of compost per plant.
- ● Organic mulch: 2-3 inches of pine straw, shredded bark, or hardwood mulch (avoid cedar—it’s acidic!).
- ● Slow-release fertilizer: 1 lb of 10-10-10 or 12-12-12 (spring) + ½ lb of acid-loving plant fertilizer (e.g., Miracle-Gro Azalea/Camellia) for bigleaf types.
- ● Garden trowel or spade (for digging holes 2x wider than the root ball).
- ● Gloves (gardening or work gloves to protect hands).
- ● Watering can or hose with a soaker nozzle (for deep watering).
- ● Pruning shears (sterilized with 70% isopropyl alcohol).
- ○ Container or raised bed (optional: 15-25 gallon for dwarf varieties like ‘Little Lime’).
- ● Burlap or frost cloth (1-2 sheets per plant) for wrapping canes in late fall.
- ● Pine boughs or straw (6-12 inches thick) to insulate the base.
- ● Anti-desiccant spray (e.g., Wilt-Pruf) to protect leaves from winter drying (1 spray per plant).
Instructions for growing hydrangeas successfully in Zone 6
Here's the straightforward approach I've used for years to keep my hydrangeas blooming reliably through Zone 6 winters.
🌱 Step 1: Select and Plant Hydrangeas at the Right Time
Zone 6's short growing season means timing matters. Plant your hydrangeas in early spring (after the last frost date) or early fall (at least 6 weeks before the first frost). This gives roots time to establish before summer heat or winter cold sets in. I always check my local frost dates—last year I planted mine in early May and saw first blooms by July.
Choose a location with morning sun and afternoon shade—hydrangeas appreciate protection from intense afternoon rays. Dig a hole twice as wide as the root ball but only as deep. The top of the root ball should sit 1 inch above ground level—this prevents rot during heavy rains or winter thaw cycles. Gently loosen any circling roots before placing the plant in the hole.
☀️ Step 2: Provide Consistent Moisture and Fertilization
Hydrangeas in Zone 6 need 1-1.5 inches of water per week—more during extreme heat. I water deeply twice weekly and mulch heavily with 3-4 inches of organic mulch (like shredded bark) to retain moisture. The key is keeping roots consistently damp but never soggy—hydrangeas hate wet feet.
Fertilize in early spring with a balanced 10-10-10 formula (about ¼ pound per plant). For blue blooms, add aluminum sulfate (1 tablespoon per gallon of water) monthly during growing season. If you want pink flowers, skip the aluminum—hydrangea color changes based on soil pH! Test your soil in late winter to plan your amendments.
✂️ Step 3: Prune Strategically for Zone 6 Winters
This is where most Zone 6 gardeners go wrong. Never prune in fall—it stimulates new growth that won't harden off before winter. Instead, prune late winter or early spring (just as buds begin to swell). For mophead and lacecap hydrangeas, cut back old wood (last year's stems) to just above the first set of outward-facing buds. You'll see these buds forming in late winter—they look like little knobs where leaves used to be.
For panicle and smooth hydrangeas, which bloom on new wood, you can be more aggressive—cut back ⅓ of the oldest stems each year to encourage fresh growth. Always sterilize your pruners with rubbing alcohol between cuts to prevent disease spread. After pruning, apply a 2-3 inch layer of mulch around the base to protect roots from freezing and thawing cycles.
❄️ Step 4: Prepare for Zone 6 Winters
Zone 6's 20-30°F winters can damage tender hydrangea stems, but with proper protection, your plants will bounce back. After the first hard frost, cut back any remaining foliage and wrap the plant in burlap or frost cloth. I also mound 4-6 inches of soil or mulch around the base—this insulates roots and prevents freeze-thaw damage. For extra protection, add a wire cage and fill it with straw or leaves over the top.
Don't remove winter protection until mid-April when nighttime temperatures stay above 32°F consistently. You'll know it's safe when you see new shoots emerging from the base. This gradual approach prevents shock and gives your hydrangeas the best start to the season. I've had the same plants thriving for over 10 years using this method.
Tips & tricks for thriving hydrangeas in Zone 6
These practical insights will help you avoid common pitfalls and maximize your hydrangeas' potential in Zone 6's challenging climate.
Planting Precision: When planting in early spring or fall, focus on the root ball's position—it should sit just 1 inch above ground level to prevent rot during heavy rains or winter thaw cycles. I've seen many gardeners plant too deep, which suffocates roots. The twice-as-wide hole gives roots room to spread without competition, while maintaining that 1-inch elevation creates perfect drainage conditions.
Watering Wisdom: The 1-1.5 inches of water per week guideline is essential, but timing matters just as much. Water in the morning so foliage has time to dry before evening—this prevents fungal diseases that thrive in damp conditions. I've found that deep watering twice weekly is more effective than frequent shallow watering, which encourages roots to grow deeper for better stability.
Pruning Perfection: For mophead and lacecap varieties, those outward-facing buds you're targeting during late winter pruning are your visual cues—look for the little knobs where last year's leaves were. I've made the mistake of cutting too high, which removes potential blooms. For panicle types, cutting back ⅓ of the oldest stems each year keeps the plant vigorous without overcrowding. Always sterilize your pruners between cuts to prevent spreading diseases that can weaken your plants.
Winter Protection Strategy: The 4-6 inches of soil or mulch around the base creates an insulating barrier against Zone 6's 20-30°F winters. I've found that adding a wire cage filled with straw or leaves provides that extra layer of protection against freeze-thaw cycles that can damage stems. Remember, you're not just protecting the plant—you're creating a microclimate that helps roots survive the cold months.
Pro Tips for Hydrangea Zone 6
- These practical insights will help you avoid common pitfalls and maximize your hydrangeas' potential in Zone 6's challenging climate.
- Planting Precision: When planting in early spring or fall, focus on the root ball's position—it should sit just 1 inch above ground level to prevent rot during heavy rains or winter thaw cycles.
- Watering Wisdom: The 1-1.5 inches of water per week guideline is essential, but timing matters just as much.
Frequently asked questions
Got questions about growing hydrangeas in Zone 6?
You’re not alone! Here are answers to the most common concerns—from pruning to winter prep—so you can keep your blooms happy year-round.
What’s the best way to protect hydrangeas from Zone 6 winters?
Zone 6 winters can be harsh, but hydrangeas are tough! Mulch heavily (3–4 inches) with shredded leaves or straw around the base, and wrap the plant in burlap or frost cloth if temps dip below 10°F. For extra insurance, mound soil or mulch up to the plant’s crown in late fall. Most varieties survive with this care!
When and how should I prune hydrangeas in Zone 6?
Timing depends on your type:
- Bigleaf (mophead/lacecap): Prune right after flowering (late summer) to avoid cutting off next year’s blooms.
- Panicle (e.g., ‘Limelight’): Prune in late winter/early spring to shape and encourage new growth.
- Oakleaf: Light pruning in late winter to remove dead wood.
Can I grow hydrangeas in containers in Zone 6?
Choose compact varieties like ‘Endless Summer’ or ‘Little Lime’ for pots. Use well-draining soil, a container with drainage holes, and move pots to a sheltered spot (or indoors) when temps drop below 20°F. Group containers together for shared warmth, and mulch the soil surface to protect roots.
Why are my Zone 6 hydrangeas wilting or turning brown?
Common culprits include:
- Underwatering: Hydrangeas love moisture—water deeply 1–2x weekly (more in heat).
- Overwatering: Soggy soil leads to root rot. Ensure pots/containers drain well.
- Pests: Check for aphids or spider mites (spray with neem oil if needed).
- Fungal issues: Brown leaves? It might be powdery mildew. Improve airflow and avoid overhead watering.
What’s the easiest hydrangea variety for beginners in Zone 6?
Start with these low-maintenance picks:
- ‘Endless Summer’: Reblooms all season; tolerates partial shade.
- ‘Annabelle’: White panicles, drought-tolerant, and pest-resistant.
- ‘Nikko Blue’: Hardy oakleaf variety with stunning fall color.
Wrapping up and next steps
Growing hydrangeas in Zone 6 is totally doable with the right prep—and the rewards are worth it! 🌸 From choosing the perfect variety to protecting them from winter’s chill, your efforts will soon bloom into lush, vibrant foliage and stunning flowers.
Remember, a little mulch, some strategic pruning, and a cozy winter wrap can make all the difference.
Now that you’re armed with the know-how, roll up your sleeves and get planting! Start by selecting your hydrangeas, then mark your calendar for spring pruning and winter prep.
Before you know it, your garden will be the talk of the neighborhood—and you’ll be the green thumb behind it. Happy gardening! 🌿