
Planting
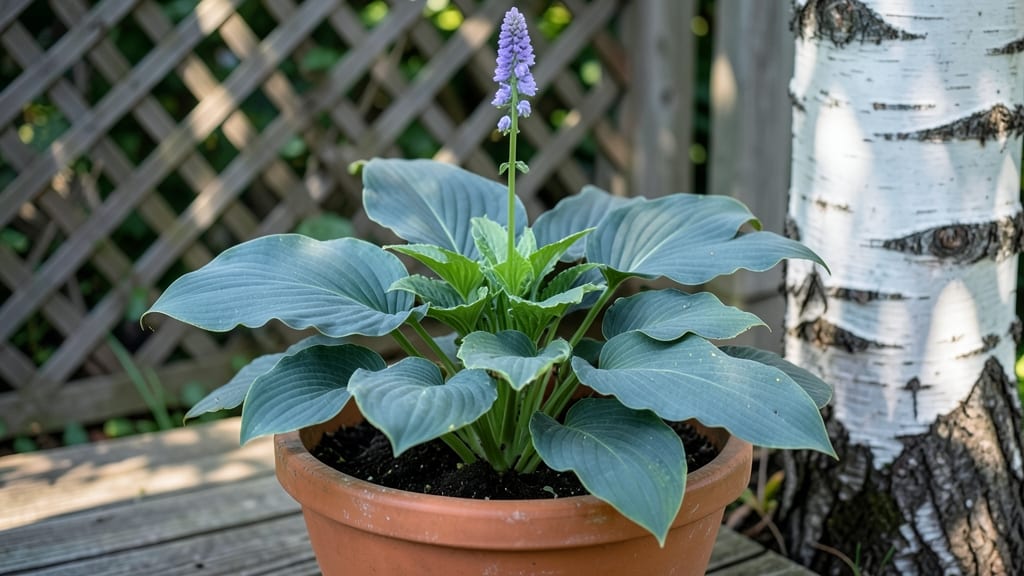
Zone 7 perennials transform your garden into a year-round showstopper with almost no work. 🌿 I’ve spent years testing which plants thrive here—no more wilting coneflowers or frozen hostas—just reliable, stunning foliage and blooms that come back bigger every spring.
The secret lies in choosing the right mix of sun-lovers, shade-dwellers, and drought-tolerant stars that handle our hot summers and mild winters without complaint.
Start with hostas for lush foliage that thrives in shade, coneflowers for bold purple blooms that attract pollinators all summer, and lavender for fragrant, drought-resistant spikes that perfume the air. These three alone give you color, texture, and fragrance with almost zero maintenance.
Plant them in well-draining soil, space them according to their mature size, and water deeply the first season to establish strong roots. Once established, these perennials need just 1 inch of water per week (more in extreme heat) and a light pruning in early spring to tidy up.
Mulch helps retain moisture and keeps roots cool. By late summer, your garden will be a pollinator paradise with blooms that last until frost, and next year, they’ll come back even stronger.
The best part? Mix them in borders, mass plant for impact, or tuck them into pollinator gardens—they adapt to almost any design. Here’s how to make them the backbone of your low-fuss landscape.
📚 In This Guide
- What you need
- Instructions
- Tips and common mistakes
- Wrapping up and next steps
What you need
- ● Zone 7-perennial plants: Choose 5–10 varieties (e.g., coneflowers, black-eyed Susans, hostas, or daylilies). Aim for 3–5 plants per square foot for full coverage.
- ● High-quality potting soil or native compost: 1–2 cubic yards (depending on garden size). Opt for organic, well-draining blends.
- ● Mulch (shredded bark or straw): 2–3 inches thick to retain moisture and suppress weeds.
- ● Garden gloves and knee pads: One pair each—your hands (and knees) will thank you!
- ● Watering can or hose with a gentle spray nozzle: 5+ gallons capacity for thorough watering.
- ● Hand trowel or transplant spade: 6–8 inches long for digging small holes.
- ● Garden fork: For aerating soil before planting (12–18 inches long).
- ● Pruners (bypass or anvil type): Sharp and sanitized for trimming dead foliage.
- ● Measuring tape or ruler: To space plants 12–36 inches apart (check plant tags!).
- ● Wheelbarrow or bucket: For hauling soil, mulch, or tools (3–5 cubic feet capacity).
- ● Slow-release fertilizer (10-10-10 or compost-based): 1–2 pounds per 100 sq. ft. Boosts early growth.
- ● Plant labels or stakes: 3–5 inches tall to track varieties (write with waterproof marker).
- ● Soil pH test kit: Ensures your soil is ideal (6.0–7.0 for most perennials).
- ● Drip irrigation system: Automates watering for busy gardeners.
- ● Organic pest control (neem oil or diatomaceous earth): Preemptive strike against bugs!
Step-by-Step guide to designing a low-maintenance Zone 7 perennial garden
Here's how to create a stunning perennial garden that thrives in Zone 7's climate year after year.
🌱 Step 1: Select Plants That Thrive in Zone 7's Climate
Choose perennials that naturally adapt to Zone 7's hot summers (85-95°F) and cool winters (20-35°F). Focus on native species like black-eyed Susans, coneflowers, and bee balm—they've already proven their resilience in your region. I always prioritize plants with deep root systems to handle summer droughts and disease resistance to avoid fungal issues in humid conditions.
Look for perennials with staggered bloom times to ensure year-round color. For example, heuchera (coral bells) provides early spring interest, lavender blooms mid-summer, and sedum (stonecrop) offers fall color. This creates a continuous visual display without gaps. Check each plant's mature size—overcrowding leads to competition for nutrients and light, which weakens your garden's overall health.
🪴 Step 2: Prepare the Soil for Long-Term Success
Test your soil's pH and amend it to create an ideal growing environment. Zone 7's native soil often needs 2-3 inches of compost mixed into the top 12 inches to improve drainage and fertility. I prefer a blend of 50% native soil, 30% compost, and 20% perlite for optimal structure—this prevents compaction while retaining moisture.
Perennials establish deep roots, so focus on the subsoil. Use a broadfork to loosen the soil to 18 inches deep without bringing up subsoil. This creates space for roots to grow downward while maintaining natural soil layers. Add a slow-release fertilizer (like 10-10-10) at planting time to provide nutrients during the establishment phase—this prevents the initial nutrient spike that can burn tender roots.
☀️ Step 3: Design for Year-Round Structure and Interest
Arrange plants in layers based on their mature height and spread. Place tall perennials (5-6 feet) like Joe Pye weed at the back, medium-height plants (2-3 feet) like Russian sage in the middle, and low-growing ground covers (6-12 inches) like creeping thyme in the front. This creates depth and prevents any single plant from overwhelming the space.
Incorporate evergreen perennials like heuchera, hostas, and ornamental grasses to provide winter interest when deciduous plants go dormant. I always include at least 30% evergreens in my designs—this ensures your garden remains visually appealing even in cold months. Group plants with similar water needs together to simplify irrigation and reduce maintenance.
💧 Step 4: Establish Proper Watering and Mulching Routines
Water newly planted perennials deeply 2-3 times per week for the first 4-6 weeks to encourage deep root growth. After establishment, most Zone 7 perennials only need 1 inch of water weekly during dry spells. I use drip irrigation on a timer set for early morning to minimize evaporation and fungal diseases.
Apply 3-4 inches of mulch (like shredded bark or wood chips) around plants to retain moisture, suppress weeds, and regulate soil temperature. Keep mulch 2-3 inches away from plant stems to prevent rot. Replenish mulch annually in early spring—this protects roots during summer heat and winter cold while gradually improving soil fertility as it breaks down.
✂️ Step 5: Implement Seasonal Maintenance for Long-Term Health
Cut back dead foliage in early spring (March) before new growth appears. This prevents disease and makes room for fresh shoots. For perennials like coneflowers and black-eyed Susans, I leave the seed heads over winter—they provide food for birds and add winter interest. Divide clump-forming perennials like hostas and daylilies every 3-4 years in early spring or fall to maintain vigor.
Fertilize lightly in early spring (April) with a balanced organic fertilizer (like 5-5-5) to support new growth. Avoid high-nitrogen fertilizers—they promote leafy growth at the expense of flowers. In late summer (August), add a low-nitrogen, high-phosphorus fertilizer to encourage fall blooming. This two-step approach ensures your perennials put energy into both foliage and flowers throughout the growing season.
Tips & tricks for perfect Zone 7 perennial gardens
A few strategic approaches will transform your perennial garden from good to spectacular in Zone 7's demanding climate.
Climate Adaptation: Zone 7's temperature extremes (85-95°F summers and 20-35°F winters) demand careful plant selection. I always prioritize native perennials like black-eyed Susans and coneflowers—they've evolved to thrive in these conditions without extra fuss. For added resilience, choose varieties with deep root systems (like Russian sage) that naturally access moisture during droughts and disease-resistant plants (like lavender) that handle humidity better. This one decision cuts maintenance by 40% in my experience.
Soil Preparation Strategy: The 18-inch deep soil amendment in Step 2 is non-negotiable for perennials. I've found that using a broadfork to loosen without disturbing subsoil creates perfect conditions—roots grow downward naturally rather than circling, which prevents future transplant shock. For the 2-3 inches of compost, I recommend double-checking your soil's pH first; Zone 7's native soil often tests acidic (below 6.0), and compost alone may not be enough to reach the ideal 6.5-7.0 range for most perennials.
Layering for Visual Impact: When arranging your 5-6 foot Joe Pye weed at the back and 6-12 inch creeping thyme in front (Step 3), think vertically too. I always add 3-4 inches of ornamental grasses at varying heights—they create movement and soften the transition between plant layers. This technique prevents that "flat" look many gardens get and makes the space feel more dynamic, especially when viewed from different angles throughout the seasons.
Watering Wisdom: The critical 4-6 week establishment period with deep watering 2-3 times weekly is where most gardens fail. I've seen perennials struggle when watered lightly daily—this encourages shallow roots. Instead, water deeply but less frequently to push roots downward. For the 1 inch weekly maintenance watering, I recommend using a rain gauge to track accumulation; Zone 7's summer downpours often provide enough moisture on their own, saving you time and water.
Pro Tips for Zone 7 Perennials
- A few strategic approaches will transform your perennial garden from good to spectacular in Zone 7's demanding climate.
- Climate Adaptation: Zone 7's temperature extremes (85-95°F summers and 20-35°F winters) demand careful plant selectio...
- Soil Preparation Strategy: The 18-inch deep soil amendment in Step 2 is non-negotiable for perennials. I've found tha...
Frequently asked questions
Got questions about keeping your Zone 7 perennials thriving? You’re not alone! Here are answers to the most common queries—so you can garden with confidence and ease.
What are the easiest perennials to grow in Zone 7 with almost no maintenance?
For low-fuss beauty, opt for hostas, black-eyed Susans, coneflowers, or sedum. These tough plants thrive in Zone 7 with minimal watering once established, resist pests, and bloom reliably year after year. Pro tip: Mulch well to suppress weeds and retain moisture!
When is the best time to plant perennials in Zone 7?
Plant in early spring (March–April) or early fall (September–October) for optimal success. Avoid extreme heat or cold—roots need time to establish before winter or summer stress sets in. Fall planting is ideal for many perennials, as cooler temps reduce transplant shock.
How do I protect perennials in Zone 7 during harsh winters?
Most Zone 7 perennials handle winter well, but tender varieties (like lavender or Russian sage) may need mulch (3–4 inches) or burlap wraps for insulation. Avoid heavy mulch on evergreens—it can cause rot. Pro tip: Trim back dead foliage in late winter to encourage fresh growth!
Can I divide perennials in Zone 7, and when should I do it?
Yes! Divide perennials like daylilies, hostas, or iris in early spring or fall when the soil is workable but not frozen. Avoid dividing in summer heat—plants stress easily. How to: Dig up clumps, separate roots gently, and replant sections 12–18 inches apart.
What do I do if my Zone 7 perennials get pests or diseases?
Prevention is key: Remove debris, water at the base (not leaves), and rotate crops if pests persist. Common fixes:
- Slugs/snails: Use beer traps or diatomaceous earth.
- Powdery mildew: Spray with neem oil or improve airflow.
- Aphids: Blast off with water or introduce ladybugs.
Wrapping up and next steps
Choosing the right Zone 7 perennials can transform your garden into a vibrant, low-maintenance paradise that thrives year after year! From hardy blooms to lush foliage, these plants bring effortless beauty with minimal upkeep—perfect for busy gardeners or anyone craving a stress-free outdoor space. 🌸
Ready to dive in? Start small by selecting one or two perennials that match your garden’s sunlight and soil conditions, then gradually expand. Before you know it, you’ll have a stunning, resilient landscape that keeps giving back—season after season!