
Planting
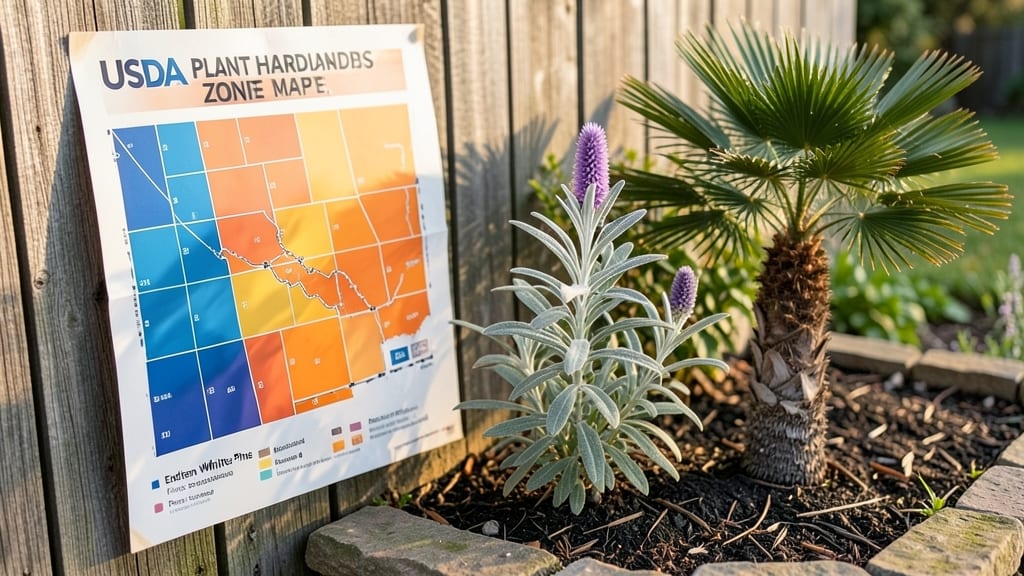
The new planting zones have reshaped how I garden—microclimates are the secret to perfect timing that makes all the difference between thriving plants and wasted seeds. 🌱 I used to follow the USDA zone chart religiously, only to watch my tomatoes... bolt before summer even arrived.
Turns out, the real magic happens in the microclimates hiding right in your own backyard.
The trick is simple: your yard isn't one zone—it's a patchwork of sun pockets, shaded corners, and windy edges where frost lingers longer. A south-facing wall might be a full zone warmer than your north side, while a low spot collects cold air like a bowl.
These microclimates shift planting windows by 2-4 weeks—enough to catch the perfect moment for seeds or transplants.
You'll start noticing opportunities you missed before: planting heat-lovers earlier in sheltered spots, protecting tender crops from late frosts in cold pockets, and extending your growing season by 30+ days just by moving plants a few feet.
The payoff? Larger harvests, fewer failures, and a garden that finally feels like it's working with you instead of against you.
This works for any climate—from Zone 3's brutal winters to Zone 10's mild year-round growing. The key is observing your space for just one full season before making adjustments. Let's turn those microclimates into your garden's superpower.
📚 In This Guide
- What you need
- Instructions
- Tips and common mistakes
- Wrapping up and next steps
What you need
- ● Seeds or seedlings: Choose varieties suited to your new planting zone (e.g., cold-hardy kale for Zone 3 or heat-loving okra for Zone 9). Pro tip: 💡 Buy organic or heirloom seeds for better adaptability!
- ● Compost or soil amendments: 2–3 bags (20–40 lbs each) of high-quality compost or worm castings to enrich soil structure and fertility.
- ● Mulch: Straw, wood chips, or shredded leaves (1–2 cubic yards, depending on garden size) to retain moisture and regulate temperature.
- ● Plant supports: Stakes (6–12 inches tall), cages, or trellises for vining plants like tomatoes or cucumbers.
- ● Garden trowel: 1 medium-sized (6–8 inches) for transplanting seedlings.
- ● Pruners: Bypass pruners (1 pair) for clean cuts on stems.
- ● Garden fork: Heavy-duty (18-inch) for loosening soil without disturbing roots.
- ● Watering can or hose with adjustable nozzle: A 1–2 gallon can for seedlings or a soaker hose for efficient hydration.
- ● Gloves: 1 pair of durable, breathable gardening gloves to protect your hands.
- ● Soil pH test kit: To fine-tune nutrient availability for picky plants.
- ● Row covers or frost blankets: For extending seasons in cooler zones.
- ● Drip irrigation system: Automates watering and saves time.
- ● Plant markers: Label seeds/seedlings with zone-specific tags for easy tracking.
How to determine your microclimate for perfect planting timing
Mastering your microclimate unlocks the secret to planting at exactly the right time—no more guessing or failed crops!
🌡️ Step 1: Observe Your Yard’s Sun and Shade Patterns
Start by mapping your space for 6 hours on a sunny day. Walk around with a notebook and mark where sunlight hits first (usually south-facing areas) and where shadows linger. I like to use a garden flag or stake in different spots to track movement throughout the day—this reveals microclimates within your yard that can vary by 10°F or more.
Notice how walls, fences, or even large plants create pockets of warmth or shade. A south-facing wall might stay 10°F warmer than open ground, perfect for heat-loving veggies like peppers. Take notes on where morning sun fades to afternoon shade—this tells you where cool-season crops thrive.
☀️ Step 2: Test Soil Temperature in Key Areas
Soil temperature determines planting success more than air temperature. Use a soil thermometer to check 6 inches deep in your warmest and coolest spots. For cool-season crops like lettuce, aim for 40-50°F; warm-season plants like tomatoes need 60-70°F to germinate.
Test at the same time each day (morning works best) for 3 days in a row to account for daily fluctuations. I’ve found my raised beds warm up 5°F faster than in-ground soil, so I plant heat-sensitive crops there first. If your soil runs cooler, consider black plastic mulch to absorb heat and speed up warming.
💧 Step 3: Monitor Moisture Retention by Zone
Dig small holes (4 inches deep) in different areas and fill them with water. Check which spots drain fastest—these are your drier microclimates, ideal for drought-tolerant plants like lavender. Areas where water pools indicate high moisture retention, perfect for water-loving plants like hostas or parsley.
I like to test this after a steady rain to see how long each zone stays moist. A south-facing slope might dry out in 24 hours, while a north-facing dip stays damp for 48 hours. This helps me group plants with similar water needs together.
⏰ Step 4: Track Local Frost Dates and Adjust
While the USDA zone map gives a baseline, your last frost date can vary by 2-3 weeks depending on microclimate. Check with local gardeners or use a frost-free date calculator (many extension services offer them). I’ve planted tomatoes 2 weeks earlier in my sheltered microclimate than neighbors with the same zone.
Use a frost cloth or row cover in high-risk areas to extend your growing season. Even a 5°F buffer can mean the difference between a thriving crop and a failed one. For example, my low-lying area gets frost later, so I plant peppers there 10 days after my higher ground.
🌱 Step 5: Plant Test Crops to Confirm Your Zones
Sow a fast-growing test crop like radishes or arugula in each microclimate. Their germination and growth speed reveal soil conditions. If radishes sprout 3 days earlier in one spot, that’s your warmest zone—ideal for heat-loving plants. If they bolt quickly, that area gets too hot for cool-season crops.
This real-world test is the best way to fine-tune your planting schedule. I’ve adjusted my layout 3 times based on these trials, moving heat-sensitive basil to cooler zones and peppers to the warmest spots. It’s the only way to get perfect timing** every season.
Tips & tricks for perfect microclimate planting timing
These game-changing insights will help you nail your garden's unique conditions—and finally grow what you've always wanted!
Sun Mapping Secret: When you're mapping sunlight in Step 1, I recommend doing this on a clear day with no clouds—overcast days can trick you into thinking areas get more sun than they actually do. Also, mark your observations on a simple sketch of your yard. I use colored pencils to highlight sun exposure: yellow for full sun, green for partial shade, and blue for full shade. This visual reference makes it easy to see your microclimates at a glance.
Soil Temperature Hack: In Step 2, if you don't have a soil thermometer, you can use a DIY method: stick a regular thermometer in the soil for 30 minutes. While not as precise, it gives you a good approximation. Remember, soil temperature fluctuates throughout the day, so always test at the same time each morning. I've found that checking between 10-11 AM gives me consistent readings that match my thermometer results.
Moisture Test Pro Tip: For Step 3's moisture test, I've discovered that using a small trowel to dig your 4-inch holes makes the process much cleaner and more precise. After filling with water, I like to cover the holes with a small piece of plastic wrap to prevent evaporation while I'm checking other spots. This keeps your testing conditions consistent across all areas of your yard.
Frost Date Strategy: When tracking frost dates in Step 4, consider creating a simple chart to record your observations. Include columns for predicted frost dates, actual frost dates, and any protective measures you used. I've found that over three years, my low-lying area consistently gets frost 10 days later than my higher elevation spots—this data has helped me adjust my planting schedule dramatically.
Pro Tips for New Planting Zones
- These game-changing insights will help you nail your garden's unique conditions—and finally grow what you've always w...
- Sun Mapping Secret: When you're mapping sunlight in Step 1, I recommend doing this on a clear day with no clouds—over...
- Soil Temperature Hack: In Step 2, if you don't have a soil thermometer, you can use a DIY method: stick a regular the...
Frequently asked questions
Got questions about new planting zones and how they impact your garden? You’re not alone—transitioning to microclimate-specific planting can feel tricky! Here are answers to the most common queries to help you plant with confidence.
What exactly are "new planting zones," and how do they differ from the USDA Hardiness Zones?
The new planting zones focus on microclimates—localized temperature variations (like urban heat islands or shaded spots) that can shift your plant’s ideal timing by 1-4 weeks. Unlike USDA zones (which map broad winter survival), these zones account for spring frost risks, summer heat, and soil warmth—critical for when to plant, not just what will survive.
How do I determine my specific planting zone if I’m not in a standard USDA area?
Use a localized planting calculator (like Gardeners.com’s Microclimate Tool) or check your last frost date (via National Weather Service) and soil temperature trends (use a soil thermometer). For urban gardeners, add 2–4°F to your USDA zone—concrete and pavement trap heat, delaying frost!
Can I still use seed packets’ planting dates if my zone is different?
Seed packets often list average dates based on national zones, but your microclimate might need adjustments. For example, if your zone is warmer than the packet’s recommendation, start seeds 2 weeks earlier (or vice versa). Always cross-check with local extension office data or neighborhood gardeners—their experience is gold!
What if my microclimate changes mid-season (e.g., urban heat waves or coastal fog)?
Monitor weekly soil temps and adjust! For example, coastal fog can delay planting by 1–2 weeks, while urban heat might let you plant earlier for heat-loving crops (like okra or sweet potatoes). Use shade cloth or drip irrigation to buffer extremes, and keep a planting journal to track what works each year.
Are there plants that thrive only in new planting zones (not traditional ones)?
Yes! Microclimate specialists include:
- Heat-tolerant greens: Malabar spinach or kale ‘Winterbor’ (handles 90°F+).
- Coastal dwarfs: Tomato ‘Tiny Tim’ or Peppers ‘Shishito’ (thrive in foggy, cool summers).
- Urban adaptors: Swiss chard ‘Bright Lights’ (tolerates poor soil and wind).
Check regional seed swaps or farmers’ markets for varieties bred for your niche!
Wrapping up and next steps
Understanding new planting zones and microclimates is your secret weapon for a thriving garden! 🌱 By tailoring your planting schedule to your local conditions—whether it’s a sun-drenched urban patio or a shaded woodland edge—you’ll maximize growth, minimize stress, and enjoy a bountiful harvest (or stunning blooms!).
The key is to observe, adapt, and experiment—your garden’s success is just a few adjustments away.
Ready to put your newfound knowledge into action? Start by mapping your microclimates this weekend, then pick 1-2 plants to test your timing. Keep a simple journal to track progress—you’ll be amazed at how small tweaks make a big difference! 📝✨