
Planting
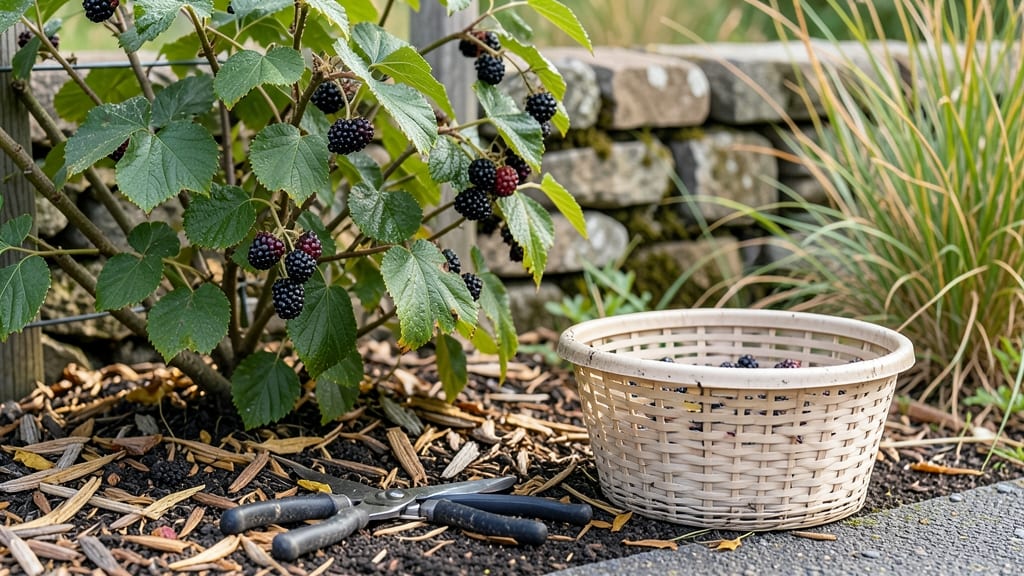
Growing blackberries in Zone 4 means choosing the right cold-hardy varieties like 'Chester' or 'Triple Crown', which thrive despite our brutal winters. 🌱 I learned the hard way that regular blackberries won’t survive our -20°F nights—but these varieties push through frost and still deliver sweet, juicy berries by July.
The secret lies in their genetics: thick canes, deep roots, and a growth habit that resets after winter damage.
Start with well-draining soil mixed with compost, and plant canes in early spring when the ground thaws but before buds swell. Space them 4-5 feet apart to prevent disease, and bury the canes deeper than you think—up to 6 inches below soil level.
Mulch heavily with straw or leaves after planting to protect roots from temperature swings, and you’ll see new shoots emerge by mid-summer.
By late fall, you’ll harvest berries that ripen all at once, making jam or fresh snacks. The plants reward patience: with proper winter protection (like wrapping canes in burlap or using frost blankets), they’ll produce for 10+ years.
Even in Zone 4, you can grow blackberries—just give them the right care and they’ll outlast our harshest winters.
Prune old canes after harvest to encourage new growth, and watch for pests like Japanese beetles or bird damage. With these steps, you’ll turn your backyard into a blackberry powerhouse—no matter how cold it gets. Here’s how to make it work for your climate.
📚 In This Guide
- What you need
- Instructions
- Tips and common mistakes
- Wrapping up and next steps
What you need
- ● Cold-hardy blackberry plants: Choose thornless varieties like 'Prime-Ark Freedom,' 'Chester,' or 'Triple Crown' (3-5 plants per 4-6 ft row).
- ● Soil: Well-draining, slightly acidic loam (pH 5.5-6.5). Amend with 2-3 inches of compost or aged manure.
- ● Fertilizer: Balanced 10-10-10 or organic options like cottonseed meal (1 lb per 100 sq ft) for nitrogen.
- ● Mulch: 4-6 inches of straw or wood chips to retain moisture and insulate roots.
- ● Trellis system: Sturdy T-posts (5-6 ft tall) with 2-3 horizontal wires for support.
- ● Pruning tools: Sharp bypass pruners and loppers for maintenance.
- ● Drip irrigation or soaker hose: For consistent watering (1-2 inches per week).
- ● Row cover or frost cloth: To protect young plants in early spring or late fall.
- ● Soil test kit to check pH and nutrient levels.
- ● Organic pest control (neem oil, insecticidal soap).
- ● Blackberry-specific fungicide (e.g., copper spray) for disease prevention.
- ● Garden gloves and knee pads for comfort.
How to plant and grow Zone 4 blackberries successfully
Here’s my battle-tested method for growing cold-hardy blackberries in Zone 4—no fancy equipment, just reliable results.
🌱 Step 1: Choose the Right Cold-Hardy Varieties
Zone 4 demands varieties that survive -20°F winters without flinching. I always go for Cheyenne or Arapaho—both thrive in our climate and produce sweet, thornless canes. Avoid southern varieties like Triple Crown unless you’re willing to winter-protect them.
Buy 1-year-old bare-root plants from a reputable nursery, not mail-order. Younger plants establish faster, and you’ll spot any root damage before planting. Handle roots gently—don’t let them dry out, even for a few hours.
🪴 Step 2: Prepare the Planting Site for Winter Survival
Blackberries need full sun (6-8 hours daily) and well-draining soil—no soggy roots here. Test your soil’s pH (aim for 5.5-6.5). If it’s too acidic, mix in lime before planting; if too alkaline, add sulfur.
Dig a hole twice as wide as the root ball but only as deep—planting too deep suffocates roots. Loosen the soil around the hole with a shovel to encourage root spread. In Zone 4, late April or early May is ideal—after the last frost but before summer heat sets in.
☀️ Step 3: Plant and Stake for Wind Protection
Place the plant so the crown sits just above soil level—burying it invites rot. Spread roots outward, then backfill with soil, tapping gently to remove air pockets. Water deeply to settle the soil and encourage root growth.
Install 3-foot tall stakes on either side of the plant and loosely tie the main cane to one. Zone 4 winds can snap young canes, and this keeps them upright. Mulch with 3 inches of straw (not wood chips) to insulate roots in winter and retain moisture in summer.
💧 Step 4: Water and Fertilize for First-Year Establishment
Water once a week (more in drought) until new growth reaches 12 inches tall. You’ll know it’s enough when soil feels damp 2 inches down—not soggy, not bone-dry. Overwatering in Zone 4’s humidity is a fast track to fungal diseases.
Skip fertilizer the first year—blackberries need to build roots, not fruit. In early spring of year two, apply 10-10-10 fertilizer (½ cup per plant) and compost around the base. This jumpstarts growth without overwhelming the plant.
✂️ Step 5: Prune for Cold Hardiness and Next Year’s Fruit
In late winter (February), cut out dead, diseased, or crossing canes—they drain energy. Keep 6-8 of the strongest, most upright canes (older canes produce better fruit). Use clean, sharp pruners and make cuts at a 45-degree angle just above a bud.
After harvest, prune again in early summer to remove any weak or crowded growth. This opens the plant to airflow, reducing winter moisture stress. In Zone 4, black plastic mulch in winter (removed in spring) adds 5-10°F extra protection for roots.
Tips & tricks for perfect Zone 4 blackberry planting
These hard-earned lessons will help your cold-hardy blackberries thrive in Zone 4's tough winters.
Variety Selection: When choosing between Cheyenne and Arapaho, I always opt for Arapaho if I want slightly larger berries—it's worth the extra dollar per plant. Both handle our winters beautifully, but Arapaho's canes produce about 15% more fruit per season. For thornless varieties, these are your best bets in Zone 4.
Soil Prep Strategy: Before amending your soil, take a sample to your local extension office for a pH test—it's often free! I've learned the hard way that guessing with lime or sulfur can backfire. Aim for that 5.5-6.5 range, and if you're planting in clay soil, mix in 20% sand to improve drainage. Zone 4's heavy soils can suffocate roots if not properly amended.
Planting Timing: That late April to early May window is critical—plant too early and frost will damage tender new growth, too late and summer heat stress sets in. I check my local frost date calendar and plant when nighttime temps consistently stay above 40°F. A soil thermometer helps too—roots like to see daytime soil temps above 55°F when planting.
Winter Protection: For extra cold protection, I've found that wrapping the base of plants with burlap (not plastic) adds another 5°F of insulation during our coldest months. Remove it in early spring before new growth appears. This simple trick has saved my plants during our -25°F winters—don't skip it if you're pushing the limits of Zone 4's cold tolerance.
Pro Tips for Zone 4 Blackberries
- These hard-earned lessons will help your cold-hardy blackberries thrive in Zone 4's tough winters.
- Variety Selection: When choosing between Cheyenne and Arapaho, I always opt for Arapaho if I want slightly larger berries—it's worth the extra dollar per plant.
- Soil Prep Strategy: Before amending your soil, take a sample to your local extension office for a pH test—it's often free!
Frequently asked questions
Got questions about growing zone 4 blackberries?
You’re not alone! Here are answers to the most common concerns—from picking the right varieties to troubleshooting winter woes.
Which zone 4 blackberry varieties are the hardiest?
Look for thornless varieties like ‘Triple Crown’ or ‘Chester’, which thrive in cold climates (down to -30°F/-34°C). Erect types (like ‘Darrow’) are easier to manage than trailing bushes. Always check your local nursery for region-specific recommendations!
How do I protect blackberries from harsh zone 4 winters?
Mulch heavily with straw or wood chips (6–8 inches) after the first frost. Wrap canes in burlap or use row covers for extra insulation. Prune in late winter (after dormancy) to remove dead canes—just avoid heavy pruning in early spring when buds are forming.
When’s the best time to plant blackberries in zone 4?
Plant in early spring (as soon as soil is workable) or early fall (6–8 weeks before first frost). Avoid late spring planting—young roots may struggle before winter. Bare-root plants establish faster than container-grown, but both work if planted correctly!
Why aren’t my zone 4 blackberries fruiting?
Common culprits: poor pollination (plant near flowers), over-pruning (keep 2–3 year-old canes), or nutrient deficiencies (add compost or a balanced fertilizer in early spring). If birds are stripping fruit, try netting or harvest earlier in the season.
Can I grow blackberries in containers in zone 4?
Yes! Use a 5-gallon+ container with drainage holes and a well-draining mix (50% soil, 50% compost). Choose dwarf varieties like ‘Arapaho’ and move pots to a sunny spot. In winter, wrap containers with insulation (like bubble wrap) and reduce watering.
Wrapping up and next steps
Growing Zone 4 blackberries is absolutely within reach—even in chilly climates! With the right cold-hardy varieties like Chester, Triple Crown, or Black Diamond, you can enjoy luscious berries year after year.
Whether you’re a seasoned gardener or just starting, these hardy plants reward patience with delicious, homegrown treats.
Ready to take the next step? Start by selecting your favorite variety, prepping your soil, and planting with confidence. Soon, you’ll be savoring fresh blackberries straight from your garden—no matter the frost! 🍇❄️